
Gear up for a bike trip
The type of trip, its duration, the itinerary, the time of year and the level of autonomy sought influence the list of equipment to be carried, the type of bags to be preferred and the way to distribute the load on the bike.
Travelling by bike, whether for a few days on your own or an expedition lasting several weeks, requires careful thought about the choice and organization of your equipment. The good news is that it doesn't have to be complicated. What you pack depends above all on how you travel!
The first step is to decide where you're going to eat and where you're going to sleep. This choice will have a direct bearing on the content of your luggage and the distribution of equipment between bags and panniers.
- Accommodation: hostels, hotels, tents or bivouacs.
- Meals: go to restaurants, eat prepared grocery store meals or cook on your own.

- Complete sleeping system, from the shelter to the blanket, including the ground mattress (if you sleep outside)
- Food and complete kitchen system from bowl to stove and utensils (if you cook)
- Clothing and equipment suitable for long-distance cycling, depending on the season and type of terrain: helmets, cycling shorts, cycling shoes and gloves are highly recommended.
- Clothing comfortable for breaks and evenings
- Sandals or comfortable evening shoes
- Personal effects: glasses, sun cream, wipes, hygiene, etc.
- Kit basic mechanics
- Kit for first aid
- Electronic: cell phone, GPS, headlamp, external battery, charging cables
Types of bike bags and panniers
Now that you know what to bring, you need to know about the possible containers, their advantages and constraints. Many enthusiasts build their own bags and panniers, or adapt existing equipment.
Creativity is the key: there is no one-size-fits-all configuration. Each trip is an opportunity to test new configurations and find a balance between comfort, lightness and autonomy.
Handlebar bag
Typical capacity: 3 to 10 liters
Benefits
Quick access to essentials (map, camera, windbreaker), good balance if securely fastened.
Limits
Can hamper handling if overloaded
Fork bags, with or without cargo cage
Typical capacity: 3 to 5 liters per side
Benefits
Optimizes storage space. Good weight distribution. Easy-to-access equipment. Easy to install.
Limits
Fork-specific attachment system. Risk of overloading, which can hamper handling.
Frame bag
Typical capacity: 2 to 8 liters
Benefits
Allows heavy, bulky objects to be stored without lateral imbalance. Maximum space savings.
Limits
Sometimes irregular in shape. Sometimes difficult to access. Frame geometry limitations.
Top tube bag
Typical capacity: 1 to 2 liters
Benefits
Quick access to everyday items (snacks, phone, glasses, etc.).
Limits
Small storage volume.
Saddle bag
Typical capacity: 5 to 20 liters
Benefits
Large volume without taking up wheel or leg space. Ideal for tent, change of clothes, etc.
Limits
May wobble or rub the tire if the attachment is not rigid or if the bag is too bulky. Adjust bag size to suit bike size.
Carrier bags or baskets
Typical capacity: 10 to 25 liters per side
Benefits
Very good volume, easy access, allows the load to be distributed on either side of the bike.
Limits
Adds weight at the rear. Reduces bike handling on unstable terrain.
Backpacks
Typical capacity: 20 to 35 liters or more
Benefits
Easy to charge, ideal for keeping essentials close at hand, suitable for days in the mountains.
Limits
Weight on the back, fatigue, less ventilation, increased weight on the saddle, can unbalance, less stable on technical terrain.
Organizational principles: balance, access, efficiency
Organizing your gear in bags and positioning them correctly on the bike maximizes comfort, accessibility and safety.
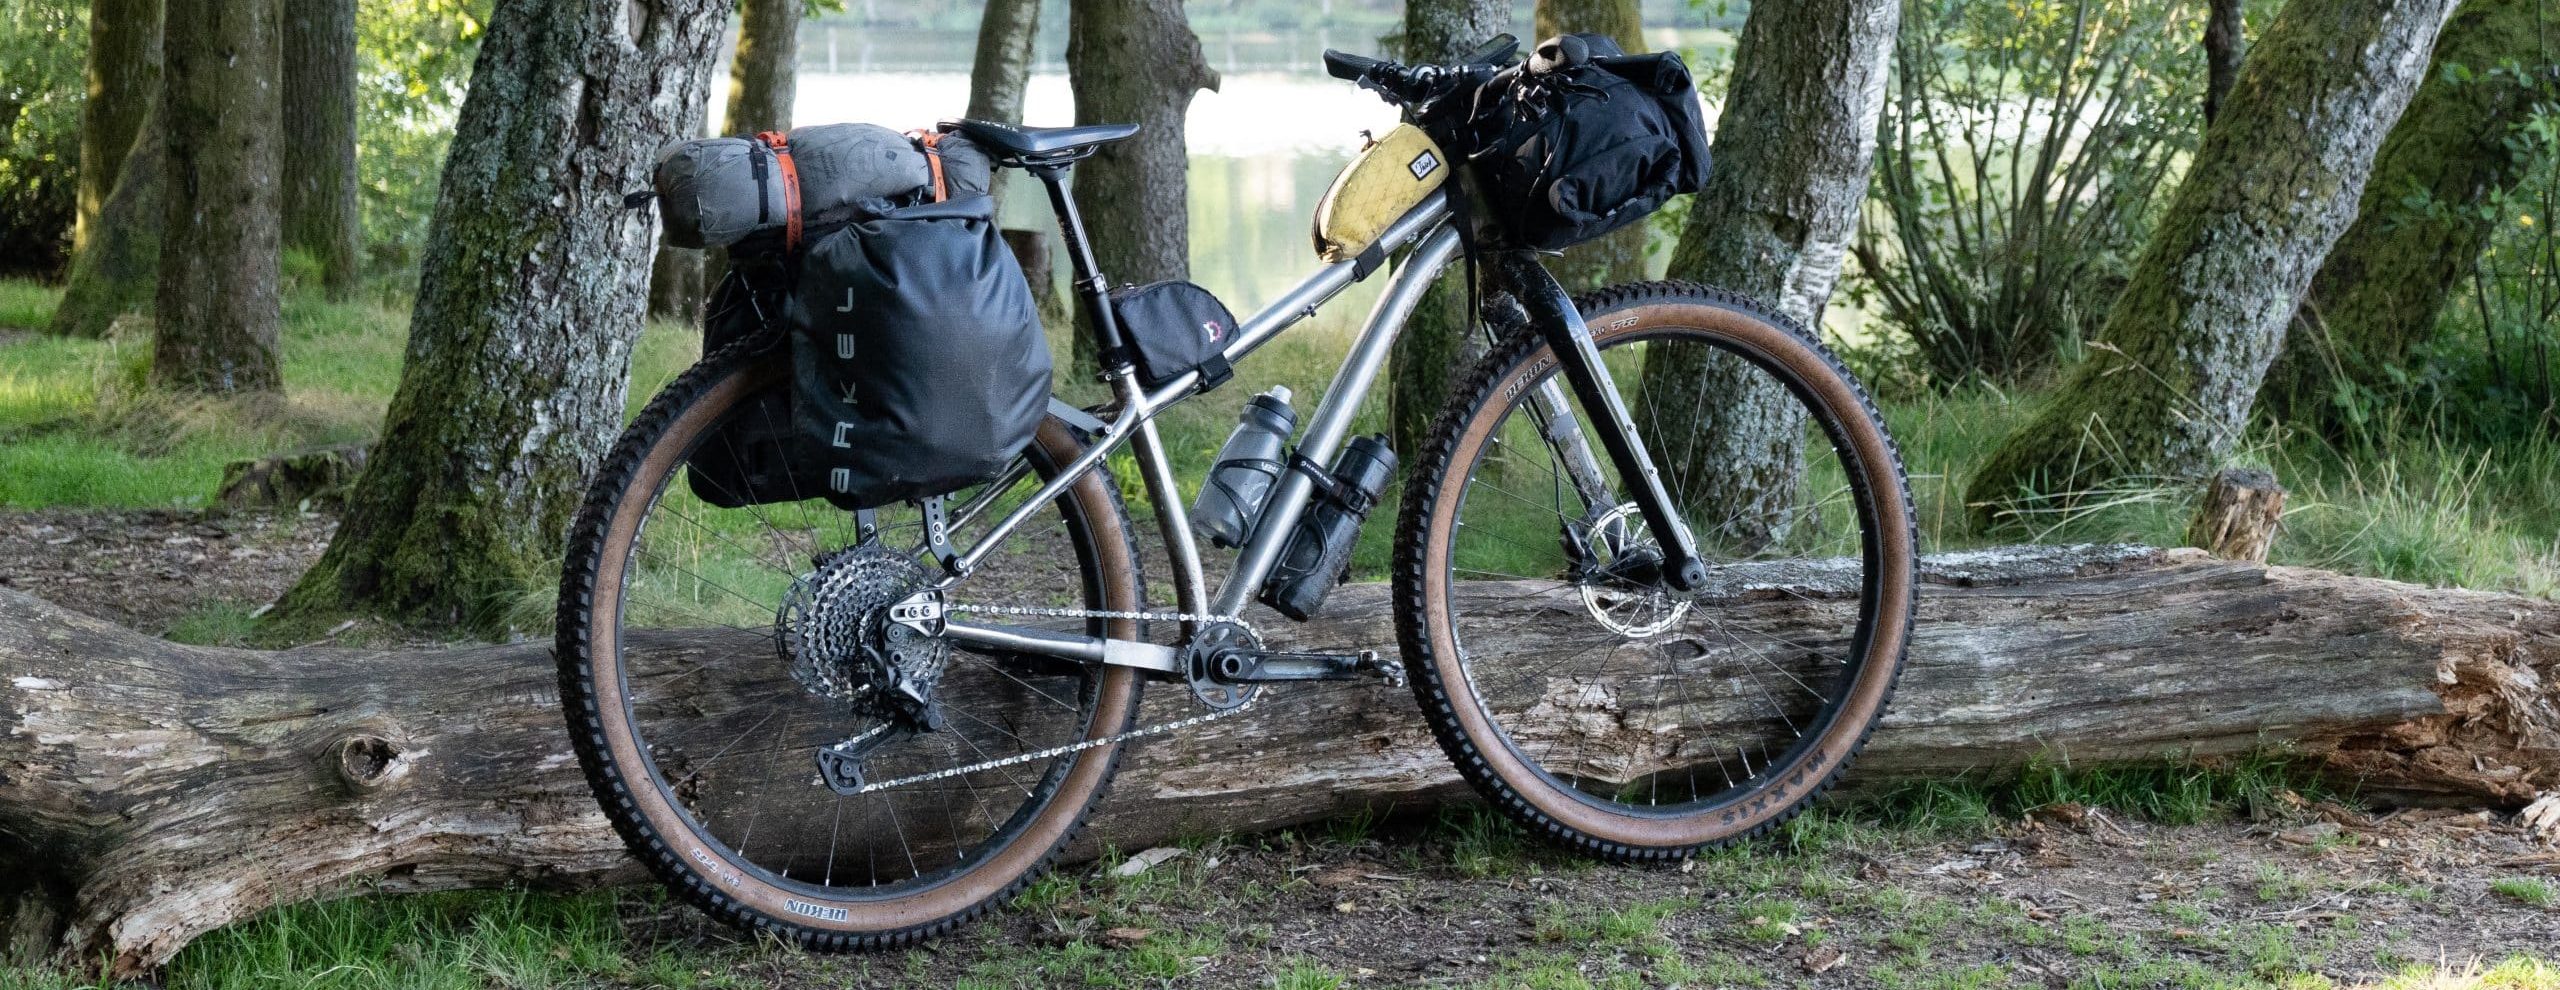
Contrary to popular belief, a bike loaded with adventure bike bags remains manageable and pleasant to ride. Thanks to their compact size and buckle straps, these bags fit most frames and can even be lifted over obstacles. A real asset on technical trails.
Weight distribution
Depending on the terrain and the rider's preferences, several configurations are possible. Experimentation is the best way to find your comfort level. There are a few basics to consider:
- Placing around 60% of the weight at the rear of the bike is generally recommended.
- Keep the weight as low as possible to improve stability.
- Place heavy items (tools, spare parts, heavy food, batteries) towards the center of the bike, ideally in the frame or near the saddle, to reduce leverage on the handlebars or rear wheel.
- Ensure symmetrical load distribution on both sides of the bike to maintain balance.
Access order
It makes sense, but it's worth thinking about! Items you'll need often or quickly (snacks, rain jacket, glasses, camera, multi-tool) should be in easy-to-reach bags (handlebars, top tube). Less-used items (thick clothing, spare parts) are best placed in the least accessible bags (saddle bag, frame bag).
To avoid damage, it's a good idea, where possible, to separate wet or leaky items (sun cream, bottles, etc.) using watertight covers or bags.
The tent is often a particular challenge. Most of the time, it is placed in the handlebar bag, if the bike has flat handlebars (mountain bike type), or in the saddle bag. It can also be divided by putting the soft part in a pannier and attaching the poles to the handlebars or top tube with straps.
Sealing and protection
Choose waterproof (or semi-waterproof) panniers or protective covers. This is particularly important for the most exposed bags, such as those on the handlebars and under the saddle.
Place all your electronic items (GPS, phone, battery) in padded pockets or internal pouches to protect them from the elements and shocks.
Versatility and adjustability
As part of a minimalist approach, use multi-purpose equipment whenever possible. Take the time to test different configurations and adjust the organization of your equipment as you go along. It is always possible to remove or add bags depending on the difficulty of the route, in order to lighten up during portages or in more technical sections. Bulky or unstable panniers remain a real handicap.
Use sturdy straps and adjustable fasteners to secure everything in place. They're invaluable. Don't hesitate to bring more than you need!
Not to be forgotten!
Protecting your bike's frame and fork before fitting bags helps prevent major paint damage. Apply a transparent protective film to all surfaces in contact with the bags. You can also use pieces of inner tube or vinyl insulating tape (often called electric tap) to protect small, specific areas of the fork, for example.


